Print labels and QR codes
Generate printable labels and QR codes for your carriers so volunteers can scan them at meetups. A carrier’s QR code links straight to its detail page, and printed labels stay valid for the life of the carrier — even after a transfer between libraries.
You can print from a single carrier’s detail page or for a batch from the Carriers list.
Steps
1. Open the label export
On a carrier’s detail page, find its QR code card, which shows the code and a Download button for that one carrier. For printable sheets, choose Print labels (or Print QR label) to open the label export dialog. To print several carriers at once, use the Print labels action from the Carriers list.
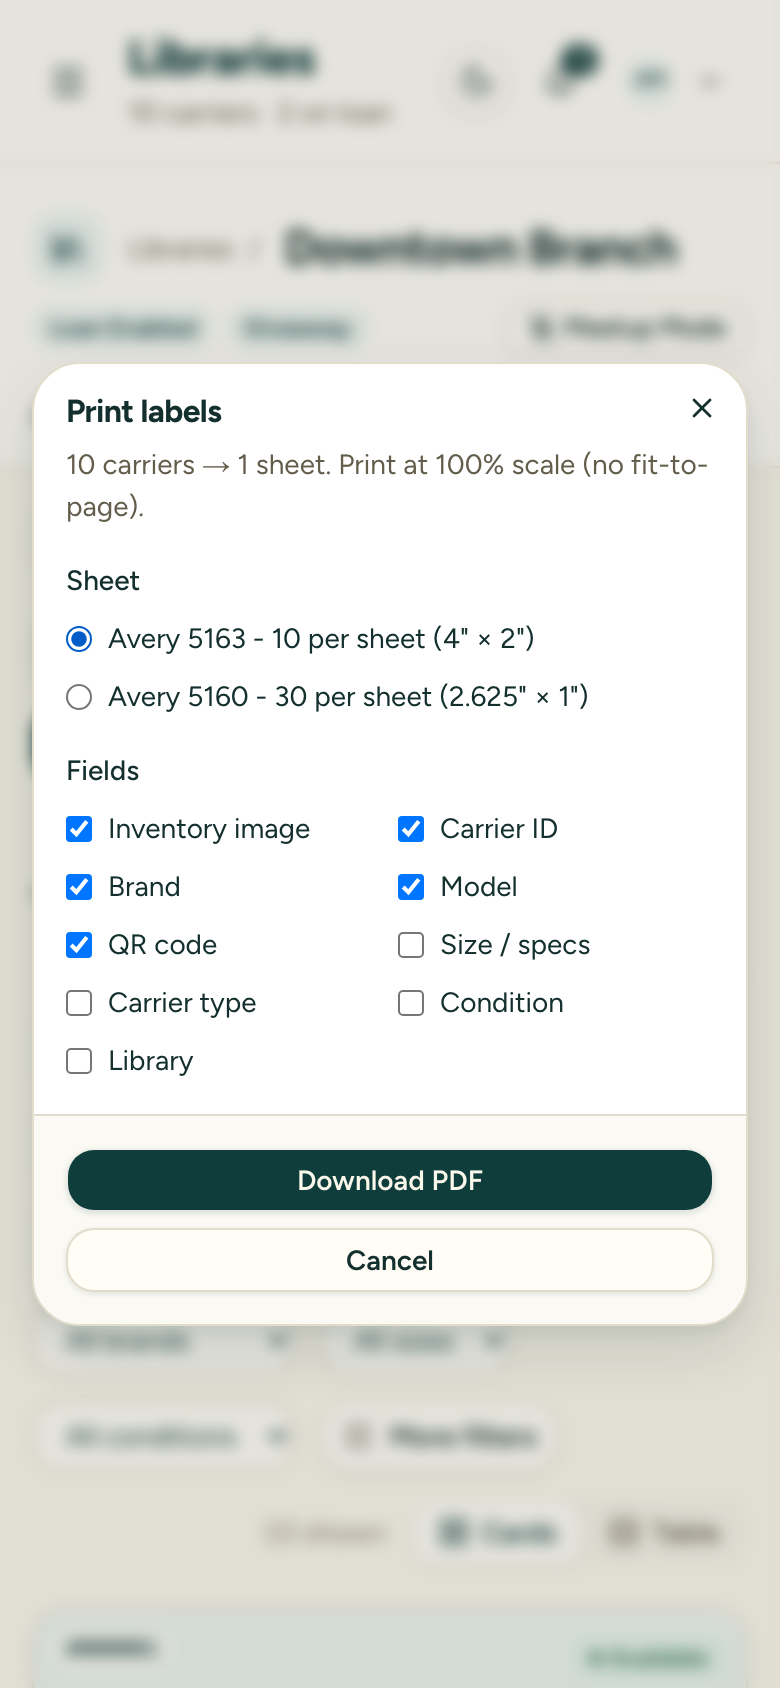
2. Choose a sheet layout
Pick an Avery label template that matches the sheets you’re printing on. The dialog shows how many carriers you’re printing and how many sheets that fills.
3. Choose which fields to include
Turn fields on or off for the label — QR code, Carrier ID, brand, model, size, type, condition, library name, and the inventory image. Keep the QR code on if volunteers will scan labels.
4. Download and print
Choose Download PDF to generate the labels, then print. Print at 100% scale with fit-to-page turned off, so the labels line up with the sheet.
Printing a carrier info sheet
Alongside labels, the detail page and Carriers list offer Print info sheet — a one-page PDF with the carrier’s specs, fit guidance, and safety notes, useful for showing caregivers at a meetup. You choose which sections to include, and your choices are remembered for that library so batch printing stays consistent.
Why labels survive a transfer
The QR code encodes a resolver link that always points to the carrier itself, and the Carrier ID never changes — including when a carrier moves to another library in your organization. So you never have to reprint a label after a transfer. A scanned code opens the carrier at its current library.