Upgrade or downgrade
Change your subscription tier to one that fits your organization’s size. Only an Org Admin can change the plan.
Steps
1. Open the Subscription page
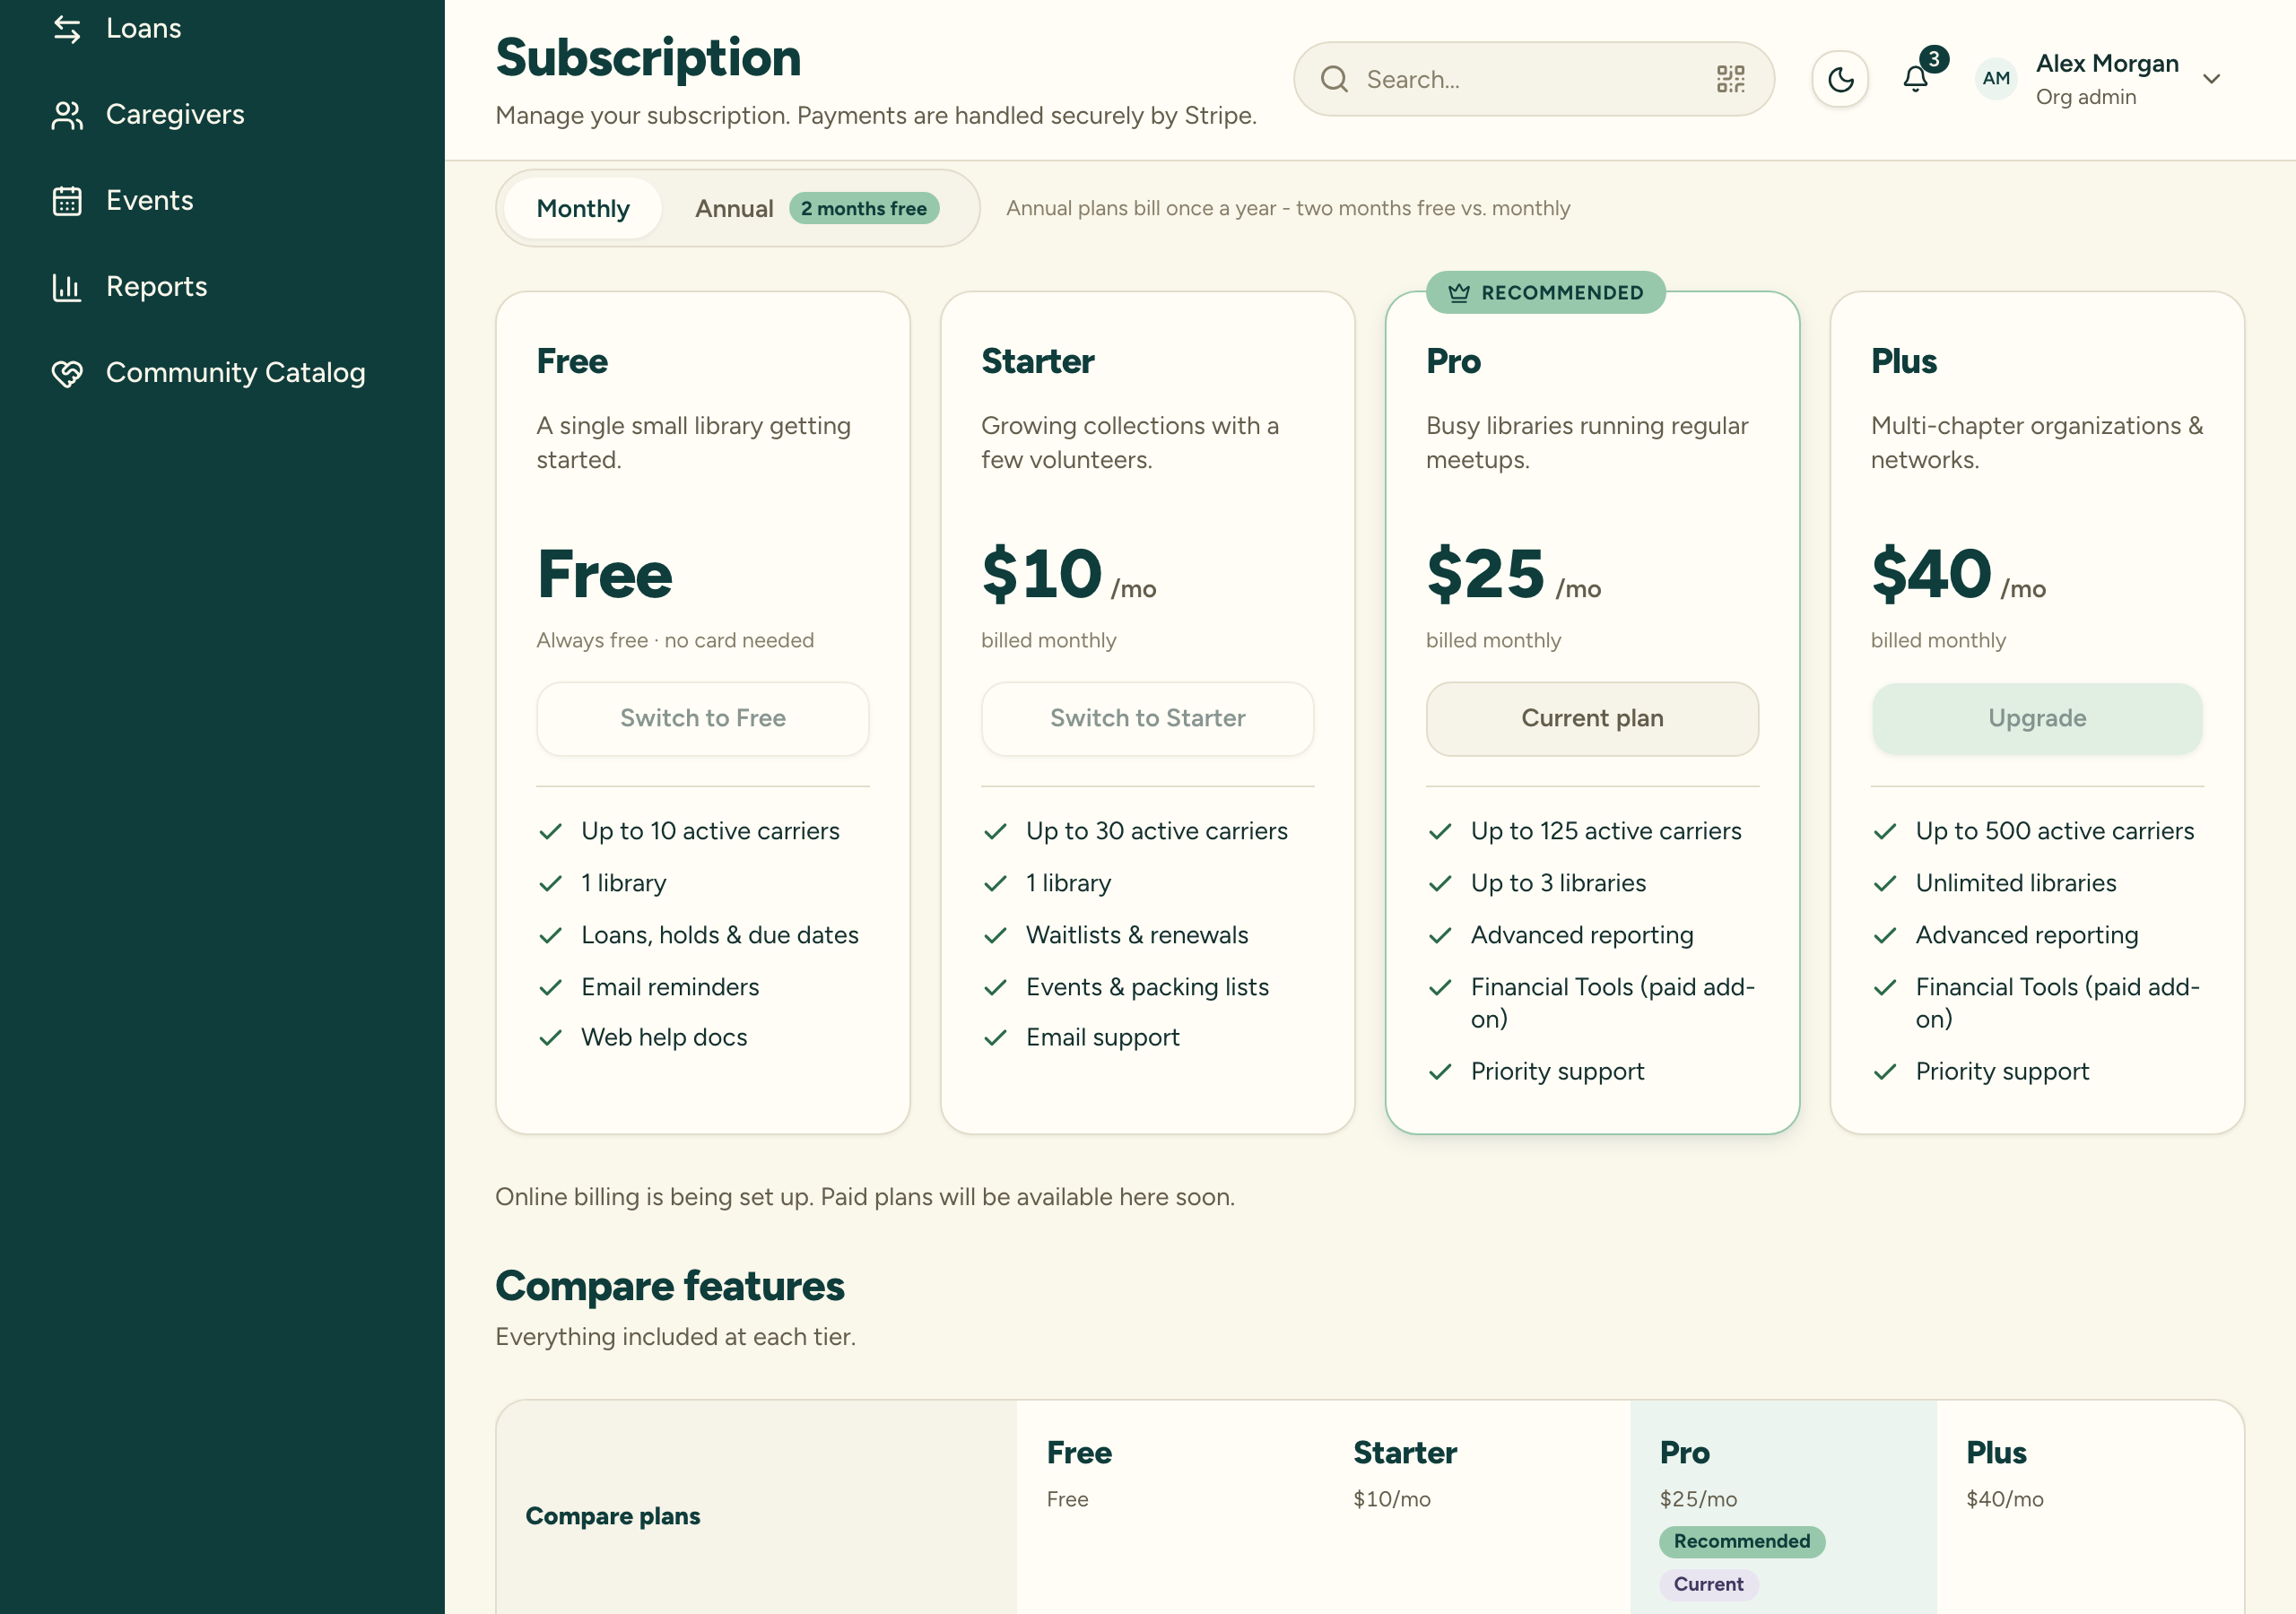
Go to your organization’s Subscription page, where the four tiers are shown side by side with their prices, carrier and library limits, and features.
2. Choose a tier
Pick the tier you want. Your current plan is marked, so you can tell an upgrade from a downgrade at a glance.
- Upgrade — moving to a higher tier (for example Starter to Pro) raises your carrier and library limits and unlocks that tier’s features.
- Downgrade — moving to a lower tier lowers your limits.
3. Confirm through Stripe
For a paid tier, you’ll complete the change in Stripe (our payment processor) checkout or the customer portal. Stripe shows the real price you’ll be charged. Changing between monthly and annual billing on an existing paid plan is a cycle switch handled in the customer portal, with proration — it doesn’t create a second subscription.
After you change tiers
An upgrade takes effect immediately. Your new, higher limits apply right away and you can add carriers or libraries up to the new caps.
A downgrade lowers your limits. If your current usage is still within the new caps, nothing changes day to day. If the downgrade leaves you over a new cap — for example you have 40 carriers and move to Free (limit 10) — the affected areas go into soft lock: existing loans and check-in keep working, but you can’t add carriers or libraries until you’re back under the limit. Archived carriers don’t count, so archiving is one way back under.
You’ll see a warning before a downgrade that would put you over a limit.